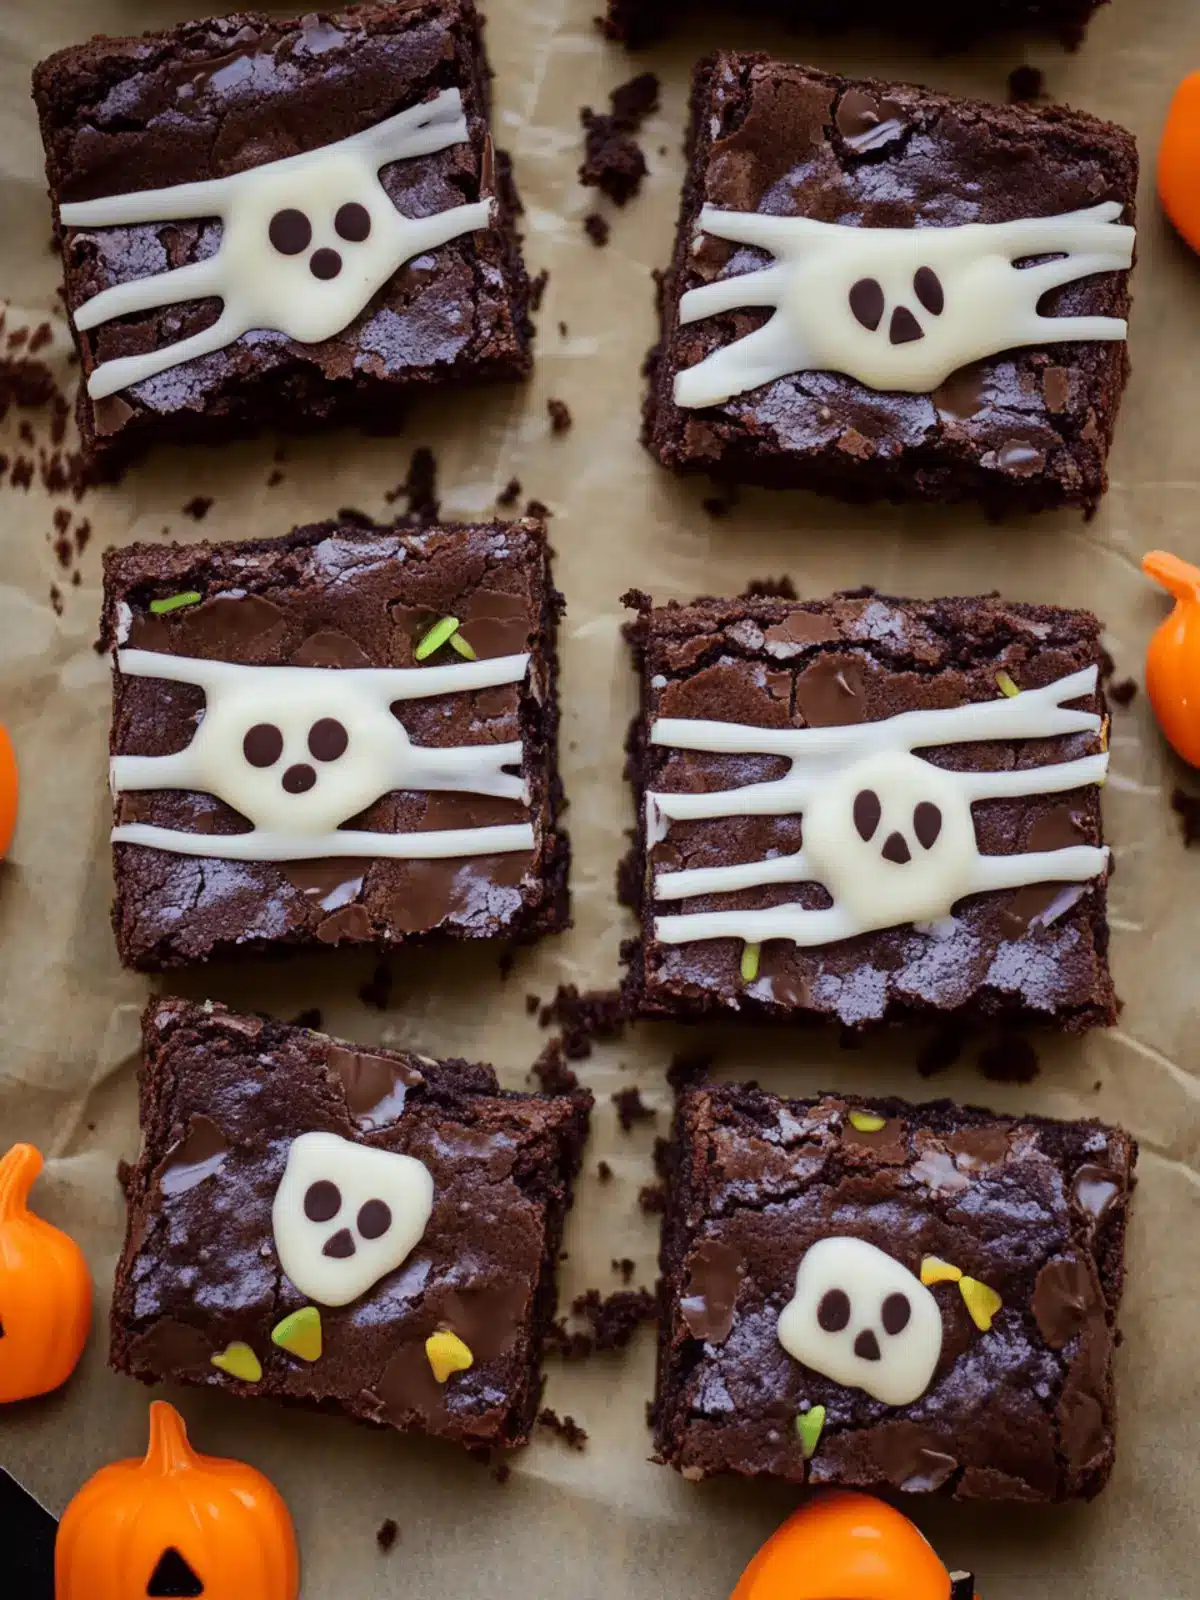
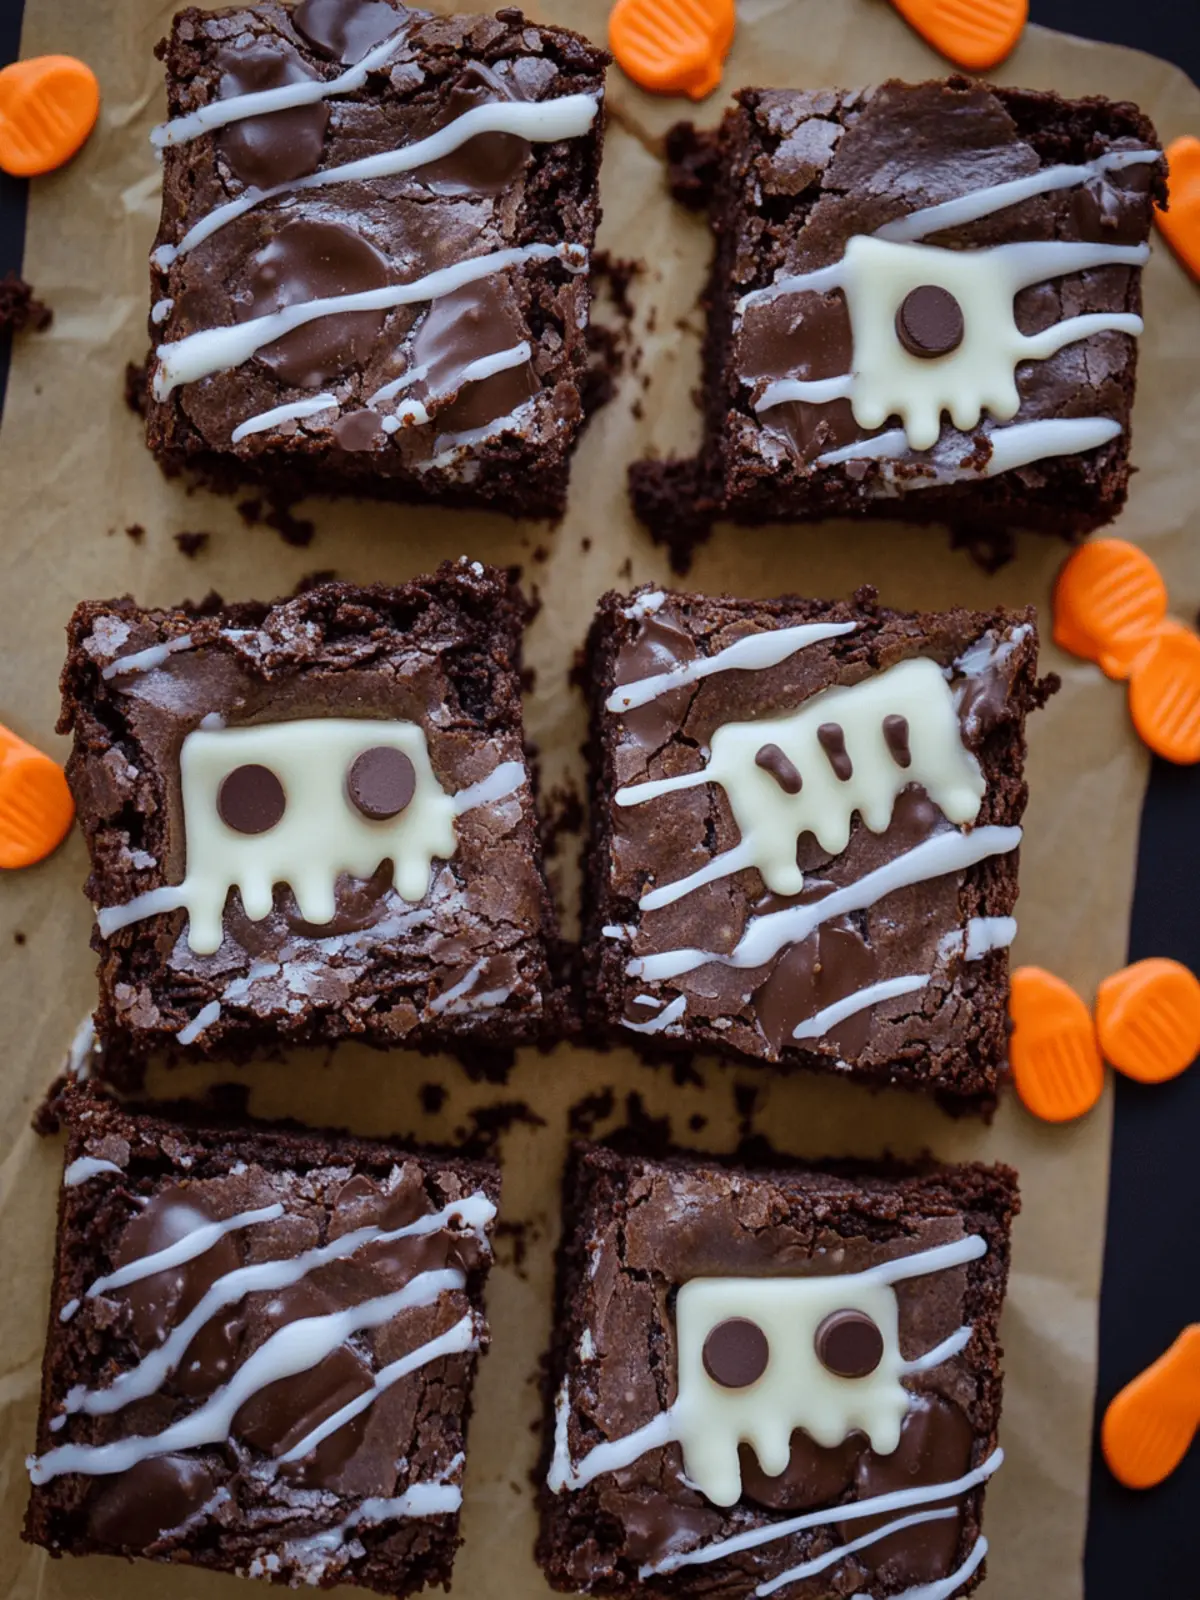
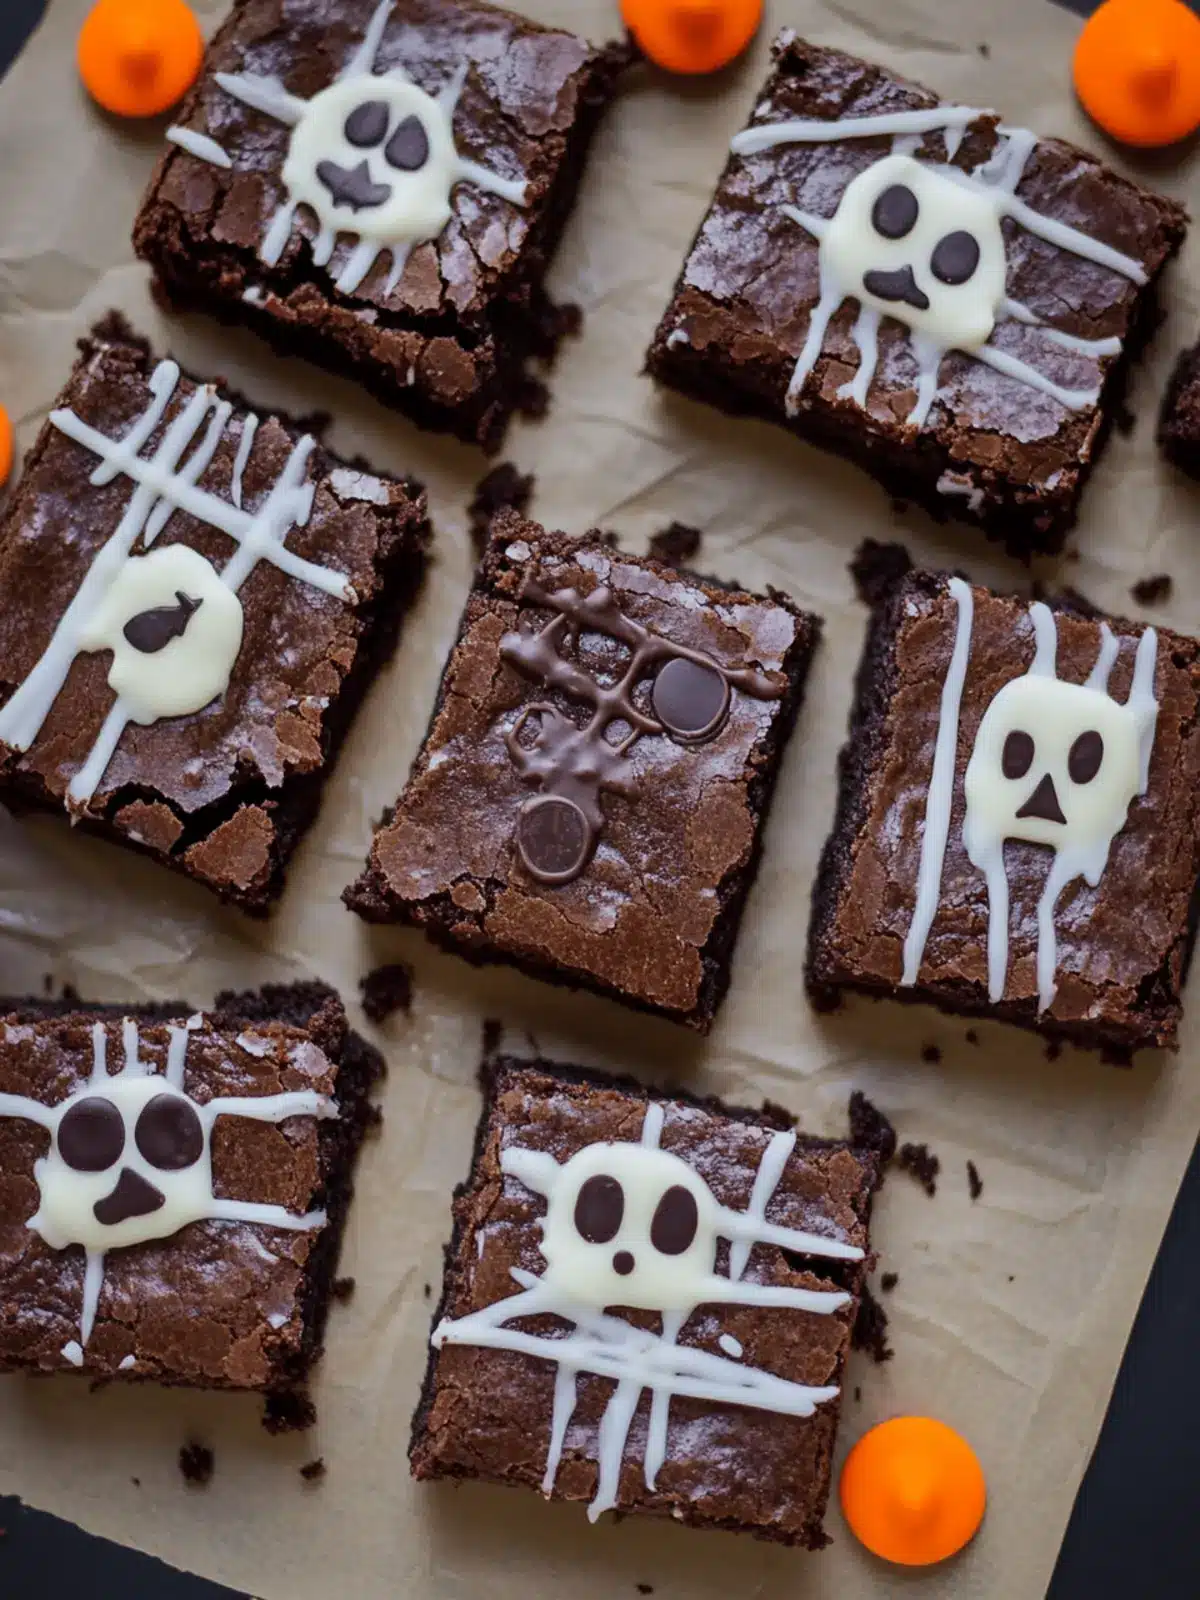
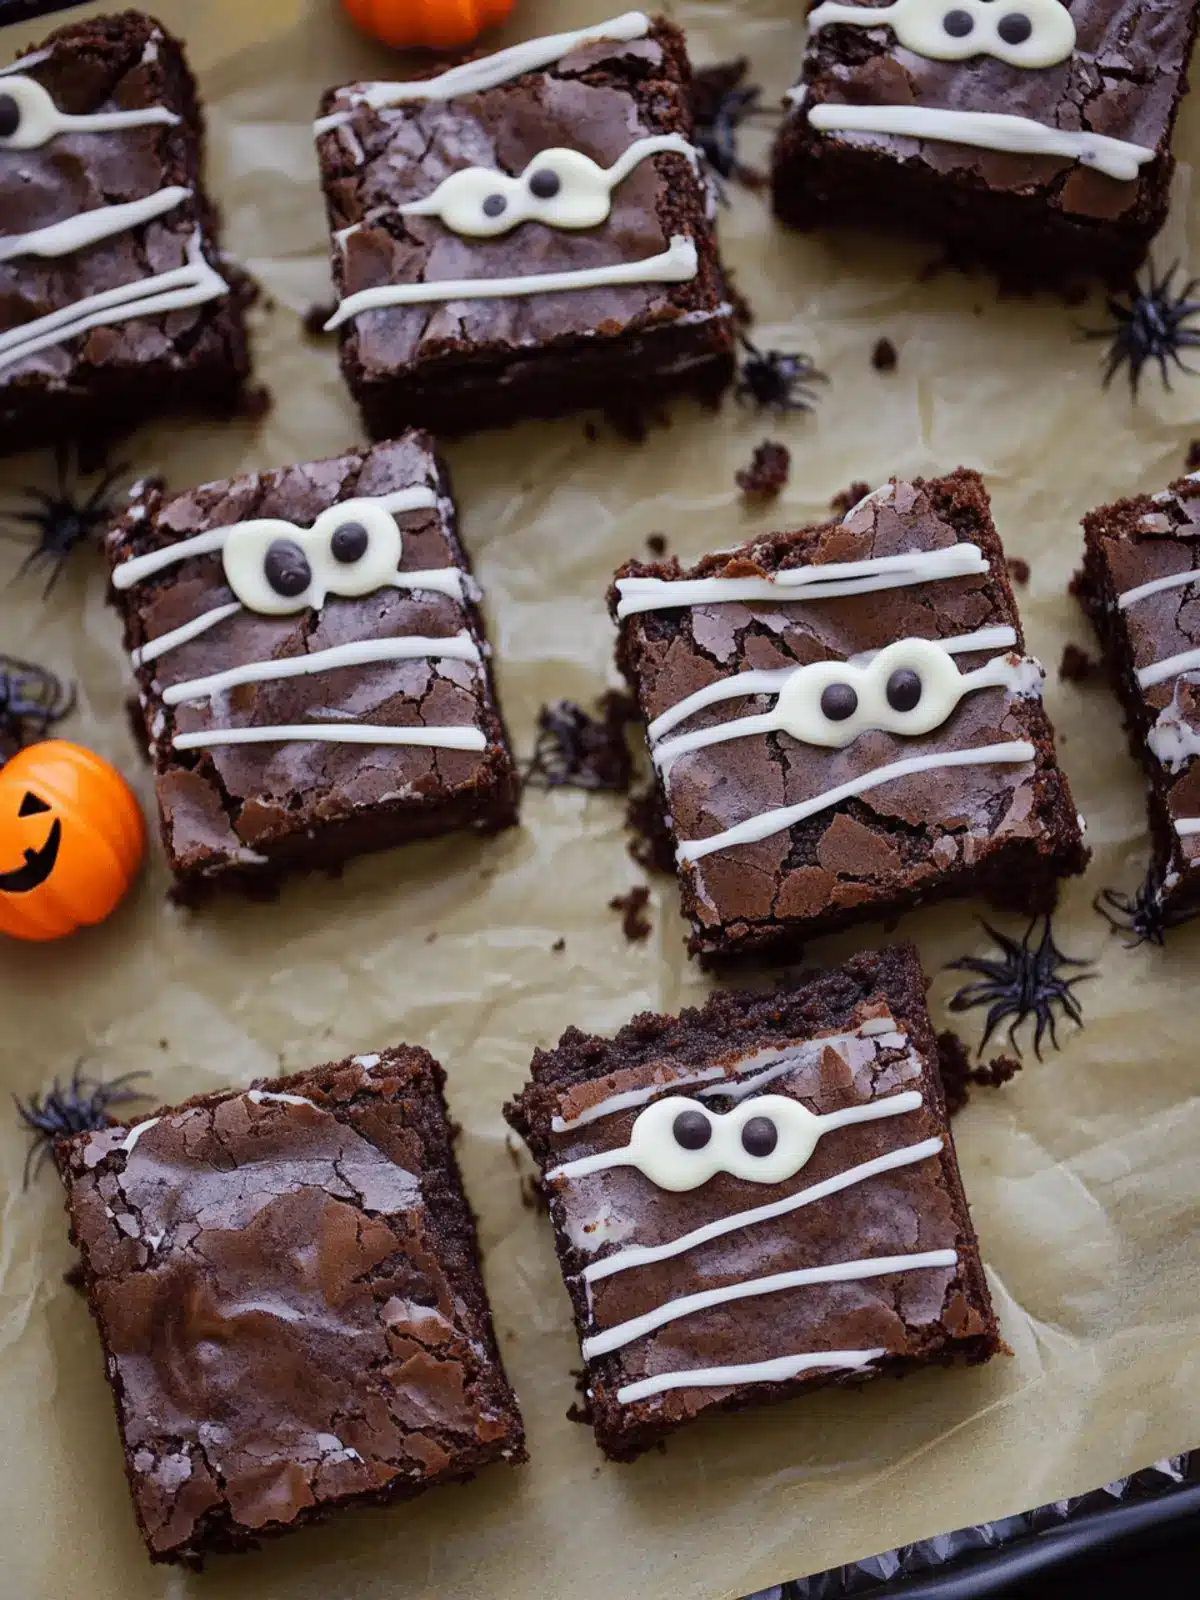
As the leaves begin to change and the air turns crisp, thoughts of Halloween beckon deliciously. Picture this: a kitchen filled with the rich aroma of chocolate, as I whip up a batch of these Easy Halloween Brownies. The first bite transports me to carefree childhood days, where holiday treats reigned supreme, each morsel a delightful surprise. Whether class parties or spooky soirées are on the agenda, these brownies are exceptionally easy to make and can be eagerly dressed up in three festive variations—ghostly figures, charming mummies, or creepy crawly spiders.
But it’s not just about the decoration; these brownies boast a moist, fudge-like texture that will make them the star of your Halloween celebrations. Each slice is a blend of nostalgia and fun, making them a crowd-pleaser for all ages. So gather the little ones, turn on some spooky music, and let’s create some magical memories in the kitchen together!
Why are Halloween Brownies a must-try?
Festive Fun: These Halloween Brownies take your baking from ordinary to extraordinary with their delightful themes that excite both kids and adults alike.
Easy to Prepare: With just a few simple ingredients, you can whip up these treats quickly, allowing more time for festivities.
Versatile Decorations: Whether you choose ghostly figures, charming mummies, or creepy crawly spiders, the options are endless for personalizing your brownies!
Flavorful Delight: Each brownie is rich and fudgy, topped with creamy frosting that perfectly complements the chocolatey goodness.
Family Bonding: Invite the kids into the kitchen for a fun and interactive baking experience that creates lasting memories, perfect for all Halloween celebrations!
Time-Saving Treat: These brownies can be prepared in under an hour, making them a great last-minute dessert for any spooky gathering.
Halloween Brownies Ingredients
For the Brownie Batter
- Salted Butter – Provides moisture and richness; can substitute with unsalted butter by reducing the added salt.
- Unsweetened Cocoa Powder – Adds deep chocolate flavor; regular or Dutch-processed can be used for the best taste.
- All-Purpose Flour – Provides structure; gluten-free flour can be swapped for a gluten-free option.
- Granulated Sugar – Sweetens the brownies; brown sugar can be used for a chewier texture.
- Large Eggs – Binds and leavens the batter; consider flax eggs for a vegan substitute.
- Baking Powder – Provides leavening; make sure it’s fresh for optimum results.
- Salt – Enhances flavor; kosher or sea salt works well.
- Vanilla Extract – Adds warmth and sweetness; for the best flavor, use pure vanilla extract.
- Instant Espresso Powder – Optional but enhances chocolate flavor; feel free to omit if not available.
For the Chocolate Frosting
- Salted Butter – Essential for creamy icing; unsalted butter can be used if preferred.
- Milk – Creates a smooth texture in frosting; any type of milk works great.
- Unsweetened Cocoa Powder – Provides a rich flavor to the frosting.
- Powdered Sugar – Sweetens and thickens the frosting; adjust to desired consistency.
These Halloween Brownies are not just about great taste; they bring the spirit of the season right into your kitchen with some creatively spooky decorations!
How to Make Halloween Brownies
-
Prepare Baking: Preheat your oven to 350°F (175°C) and line a 9×13 inch baking pan with parchment or foil, lightly greased. This helps achieve an easy release once baked.
-
Mix Brownie Batter: In a large mixing bowl, combine melted butter, cocoa powder, sugar, eggs, salt, vanilla extract, and instant espresso powder. Blend these ingredients together until smooth and well incorporated.
-
Incorporate Dry Ingredients: Gently fold in the flour and baking powder using a spatula until just combined, being careful not to over-mix for that perfect chewy texture.
-
Bake: Pour the brownie batter into your prepared pan, spreading it evenly. Bake for 25-28 minutes, checking for doneness with a toothpick—look for slight moist crumbs.
-
Cool: Once baked, remove the pan from the oven and let the brownies cool for about 15 minutes before frosting them for the best results.
-
Prepare Frosting: In a mixing bowl, beat together the frosting ingredients—salted butter, milk, unsweetened cocoa powder, and powdered sugar—until the mixture is smooth and creamy.
-
Frost Brownies: Spread the chocolate frosting over the slightly warm brownies, letting it melt into the crevices. Allow them to cool completely before slicing into squares.
Optional: Top with festive decorations to elevate your Halloween Brownies!
Exact quantities are listed in the recipe card below.
What to Serve with Halloween Brownies?
As you gather your loved ones for a fun-filled Halloween celebration, think about the perfect accompaniments to these spooky treats!
-
Chilled Milk:
A classic pairing that balances the richness of brownies, providing a refreshing contrast with every bite. -
Ghostly Marshmallow Pops:
Easy to make and delightfully cute, these marshmallow pops add a playful touch that complements the festive spirit. -
Pumpkin Spice Latte:
The warm, spiced flavors of this drink pair beautifully with chocolate, enhancing the autumn vibe at your gathering. -
Vanilla Ice Cream:
A scoop of creamy vanilla ice cream melting over warm brownies creates a luscious dessert experience that everyone will love. -
Apple Cider:
Sweet, spiced apple cider adds a seasonal twist, offering a refreshing drink that balances the brownies’ sweetness. -
Candy Corn Trail Mix:
This fun combination of nuts, chocolate, and candy corn provides crunch and sweetness while echoing the Halloween theme. -
Spooky Fruit Platter:
Incorporate seasonal fruits cut into festive shapes for a light and healthy option, brightening up your dessert table. -
Halloween-themed Cupcakes:
These can offer another sweet treat, with fun decorations that complement your brownies and keep the festive spirit alive! -
Perfectly Brewed Coffee:
Rich, aromatic coffee enhances the deep chocolate flavors of your Halloween brownies, making every bite an indulgent delight.
Storage Tips for Halloween Brownies
-
Room Temperature: Store brownies in an airtight container at room temperature for up to 5 days. This keeps them fresh and moist, ready for snacking!
-
Fridge: If you want to extend their shelf life, keep the brownies in the fridge, where they will last for up to 10 days. Make sure to wrap them well to avoid drying out.
-
Freezer: For longer preservation, freeze cut brownies in a single layer, wrapped in plastic wrap followed by foil, for up to 3 months. Thaw in the fridge or at room temperature before enjoying.
-
Reheating: For a warm treat, simply microwave a brownie for 10-15 seconds. It’s the perfect way to revive the gooey, chocolatey goodness of your Halloween brownies!
Helpful Tricks for Halloween Brownies
-
Add Espresso: Enhance the chocolate flavor by including instant espresso powder to your batter. Just a little can deepen the richness.
-
Cooling Time: Allow brownies to cool for at least 15 minutes before frosting. This avoids melting your frosting and helps achieve a smooth finish.
-
Avoiding Over-mixing: Stir the batter just until combined to preserve a light and fluffy texture in these Halloween brownies. Over-mixing can result in dense brownies.
-
Cut Carefully: Use a serrated knife to cut through the brownies without tearing. It gives you clean edges, perfect for presentation.
-
Decorate Smartly: If using melted chocolate for decoration, ensure it cools slightly before piping. This prevents runs and ensures your designs maintain their shape.
Make Ahead Options
These Halloween Brownies are perfect for meal prep enthusiasts! You can prepare the brownie batter up to 24 hours in advance by mixing it and storing it in an airtight container in the fridge. The same goes for the chocolate frosting; make it ahead and refrigerate it too. Just allow both to sit at room temperature for about 30 minutes before baking and frosting to maintain their richness and texture. When you’re ready to serve, simply spread the frosting over the brownies once they have slightly cooled, and dress them up with your favorite spooky decorations. This way, you’ll have delicious, festive treats ready to impress your family and friends with minimal effort!
Halloween Brownies Variations
Embrace your creativity and make these delightful brownies uniquely yours with these fun twists!
-
Gluten-Free: Substitute all-purpose flour with a 1:1 gluten-free flour blend for a delightful treat that everyone can enjoy.
-
Nutty Flavor: Add chopped walnuts or pecans to the brownie batter for a crunchy texture and a flavor boost that complements the chocolate beautifully.
-
Extra Chocolaty: Use chocolate chips in the batter for melty pockets of chocolate that will satisfy any chocoholic’s cravings.
-
Spicy Kick: Stir in a pinch of cayenne pepper or chili powder for a surprising heat that elevates the chocolate and adds an unexpected flavor twist.
-
Fruit Infusion: Incorporate diced strawberries or raspberries into the brownie batter. The tartness of the fruit pairs wonderfully with the rich chocolate.
-
Festive Sprinkles: Top finished brownies with spooky-themed sprinkles or edible glitter for an extra festive touch – perfect for Halloween parties!
-
Vegan-Friendly: Swap eggs for flax eggs and use plant-based butter and milk to create a deliciously rich vegan version that everyone can enjoy.
-
Marbled Delight: For a fun visual twist, swirl in some cream cheese batter before baking to create a marbled effect, adding a new layer of flavor and elegance.
Halloween Brownies Recipe FAQs
What type of cocoa powder is best for Halloween brownies?
I recommend using unsweetened cocoa powder, as it gives the brownies that rich chocolate flavor you’re looking for. Both regular and Dutch-processed cocoa can work well, but if you want a deeper flavor, Dutch-processed is the way to go!
How should I store leftover brownies?
To keep your Halloween brownies fresh, store them in an airtight container at room temperature for up to 5 days. If you have more than you can eat, you can also refrigerate them for up to 10 days, though be sure to wrap them securely to prevent them from drying out.
Can I freeze Halloween brownies?
Absolutely! You can freeze your Halloween brownies to preserve their deliciousness. Cut them into squares, then wrap each piece in plastic wrap followed by foil. They can be frozen for up to 3 months. To thaw, simply place them in the fridge overnight or let them come to room temperature on your counter!
What should I do if my brownies come out dry?
If your brownies turn out dry, it might be due to over-baking or mixing the batter too much. Always ensure you’re pulling them out when a toothpick inserted comes out with a few moist crumbs—usually around 25-28 minutes. If they continue to dry out, you might try adding a scoop of vanilla ice cream on top for a delicious fix!
Are these brownies safe for pets?
While the ingredients in these Halloween brownies are safe for most humans (unless there are allergies), chocolate is toxic to dogs and cats. So, be sure to keep these delicious treats far from your furry friends to avoid any potential hazards!
Can I make Halloween brownies gluten-free?
Certainly! To make gluten-free Halloween brownies, simply substitute the all-purpose flour with a 1:1 gluten-free flour blend. Make sure it contains xanthan gum if your blend does not—this helps provide the structure needed for the brownies to hold together beautifully.
Spooky Halloween Brownies: 3 Fun Variations to Try!
Ingredients
Equipment
Method
- Preheat your oven to 350°F (175°C) and line a 9x13 inch baking pan with parchment or foil, lightly greased.
- In a large mixing bowl, combine melted butter, cocoa powder, sugar, eggs, salt, vanilla extract, and instant espresso powder. Blend until smooth.
- Gently fold in the flour and baking powder using a spatula until just combined.
- Pour the brownie batter into your prepared pan, spreading it evenly. Bake for 25-28 minutes, checking for doneness with a toothpick.
- Once baked, let the brownies cool for about 15 minutes before frosting.
- In a mixing bowl, beat together the frosting ingredients until smooth and creamy.
- Spread the chocolate frosting over the slightly warm brownies. Allow to cool completely before slicing.
