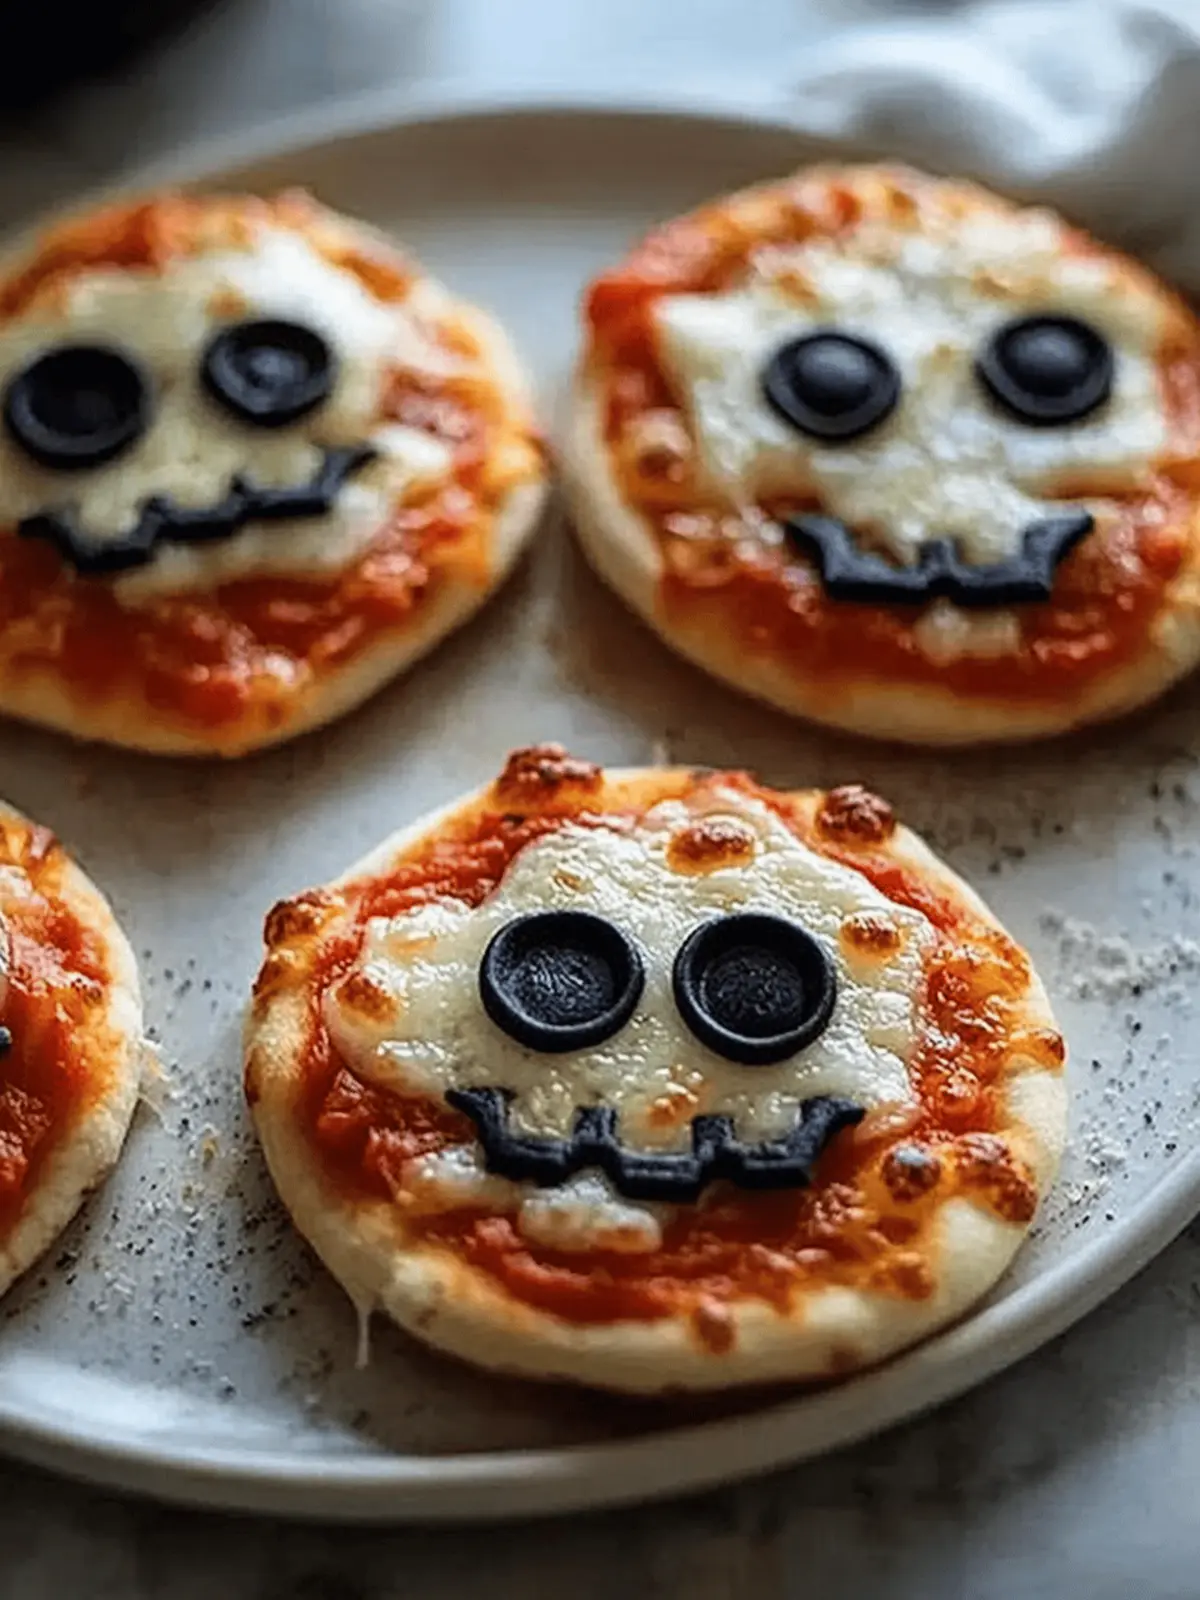
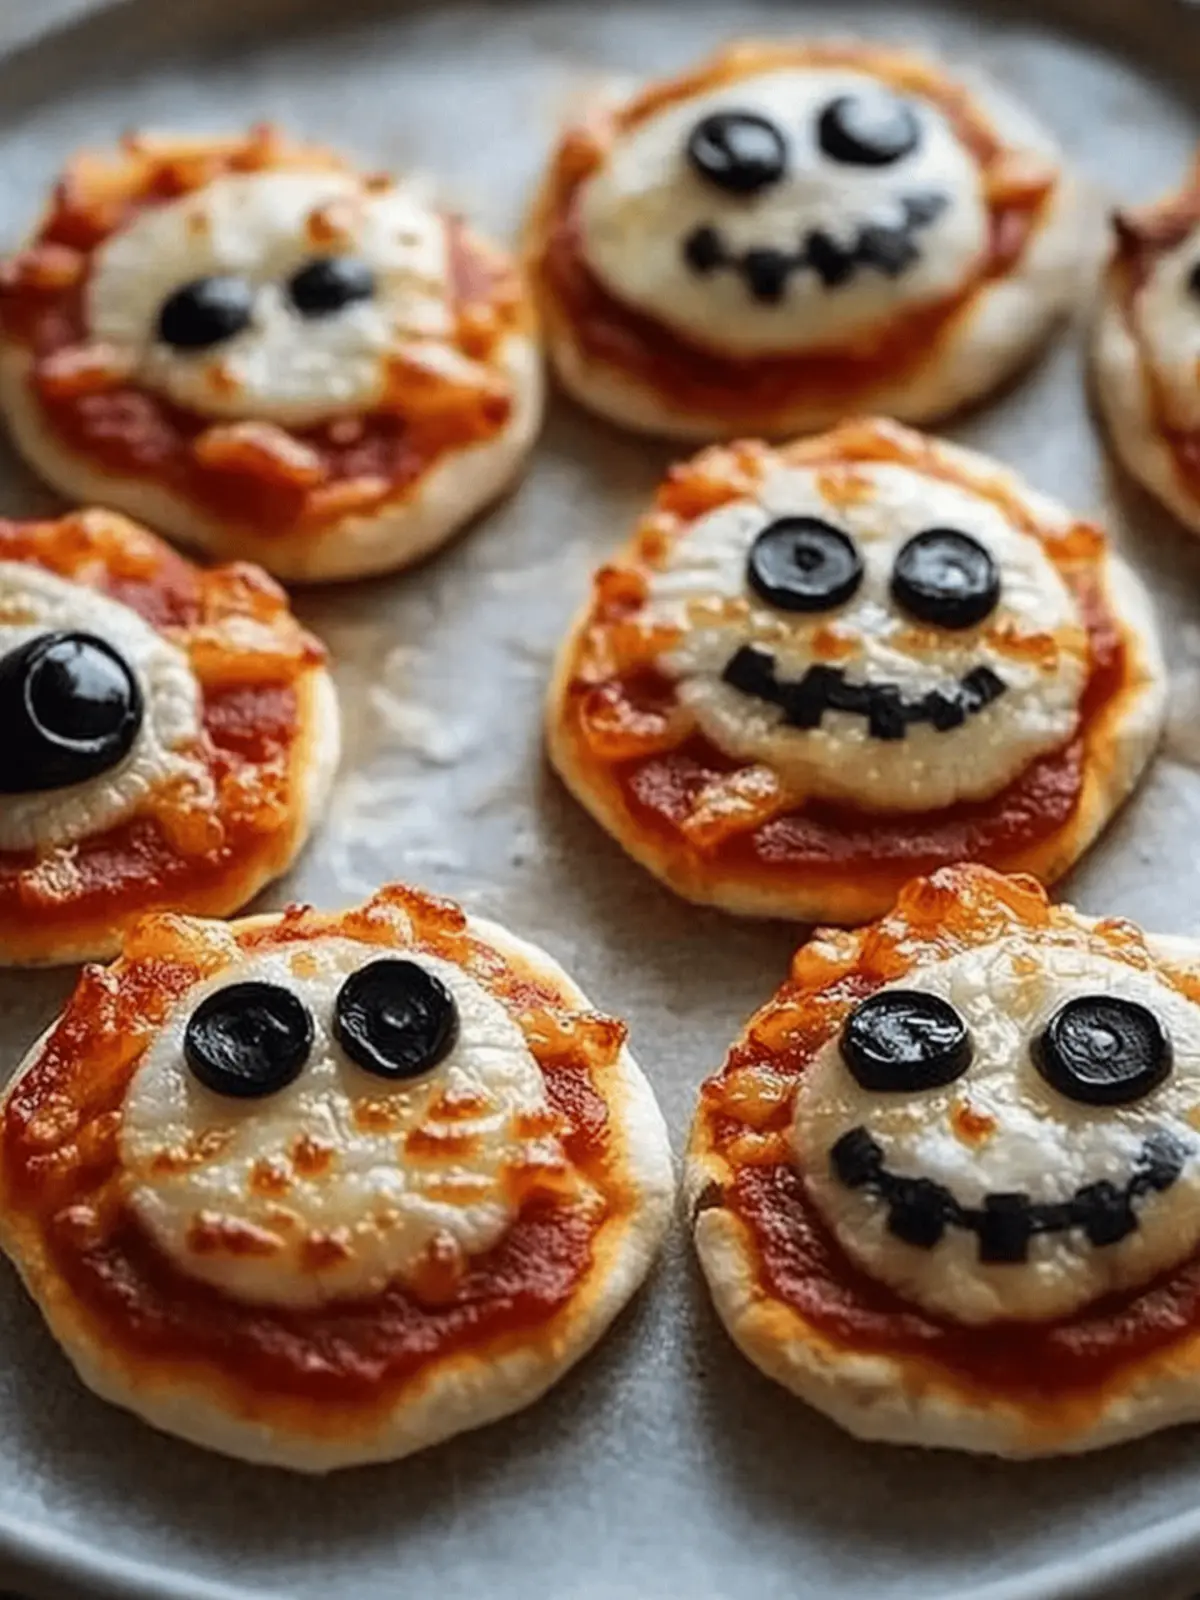
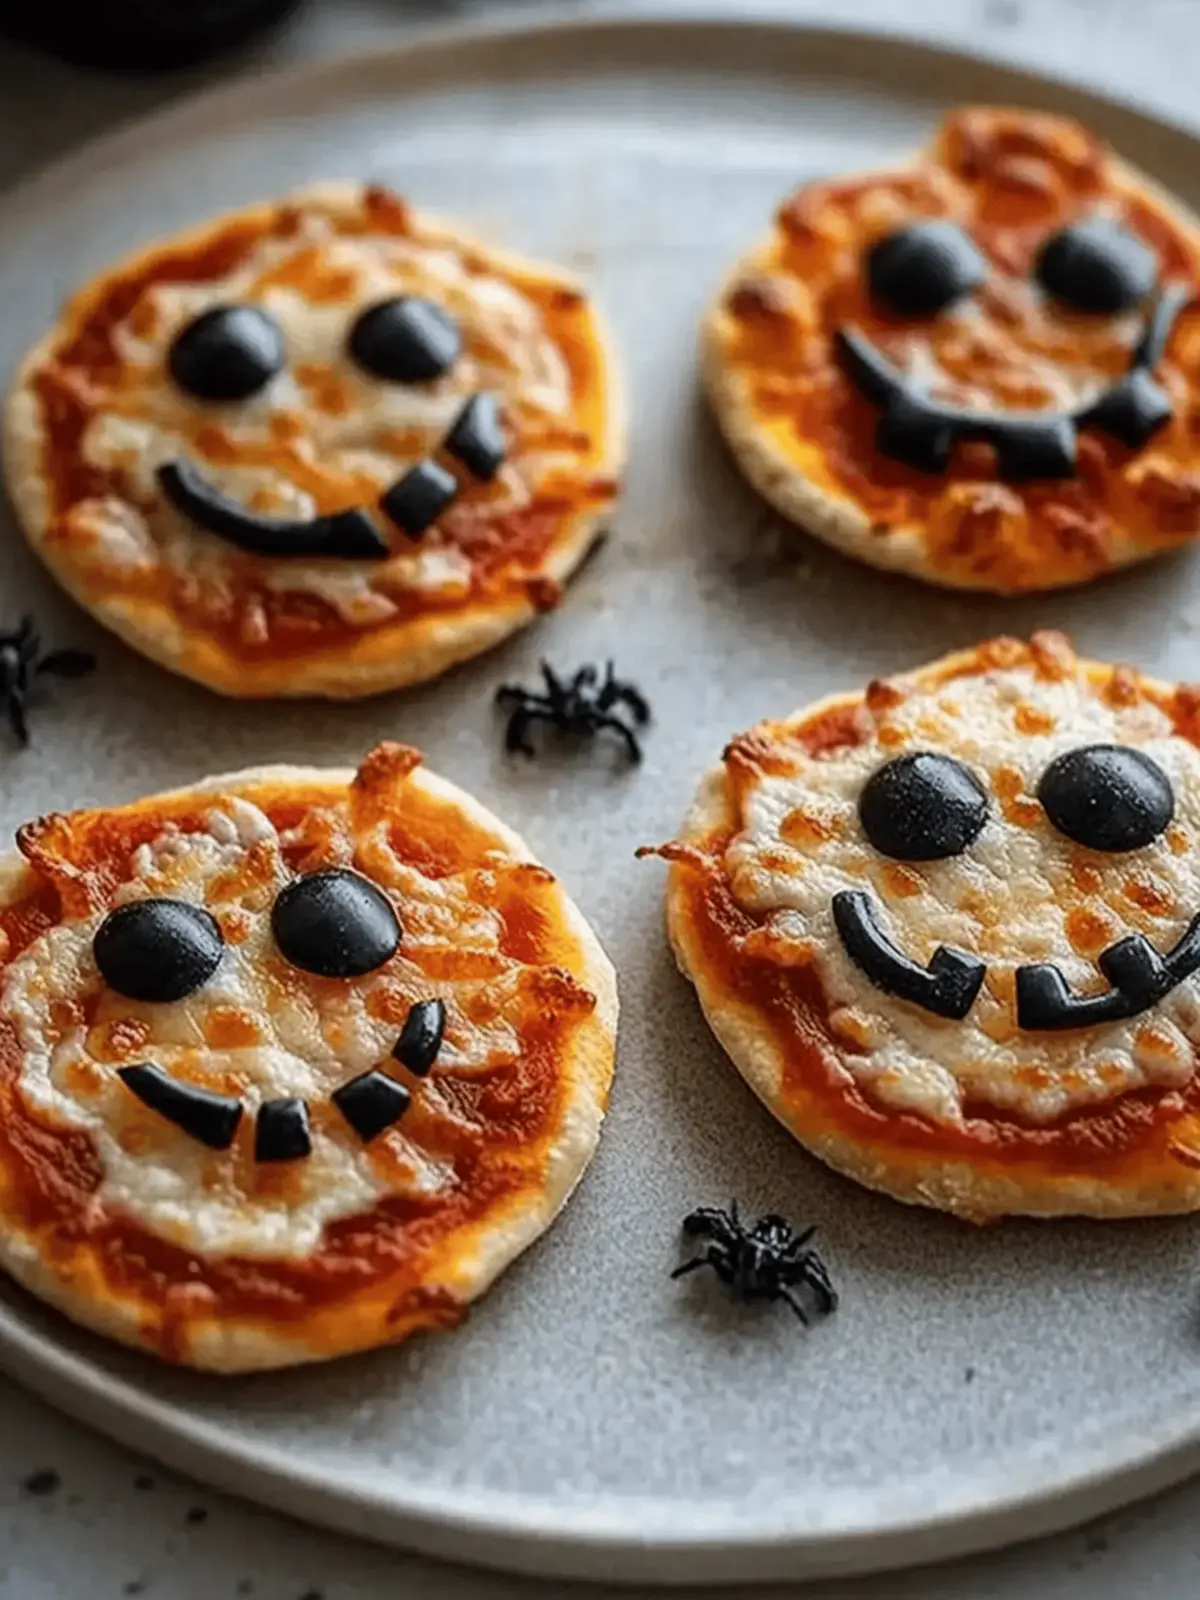
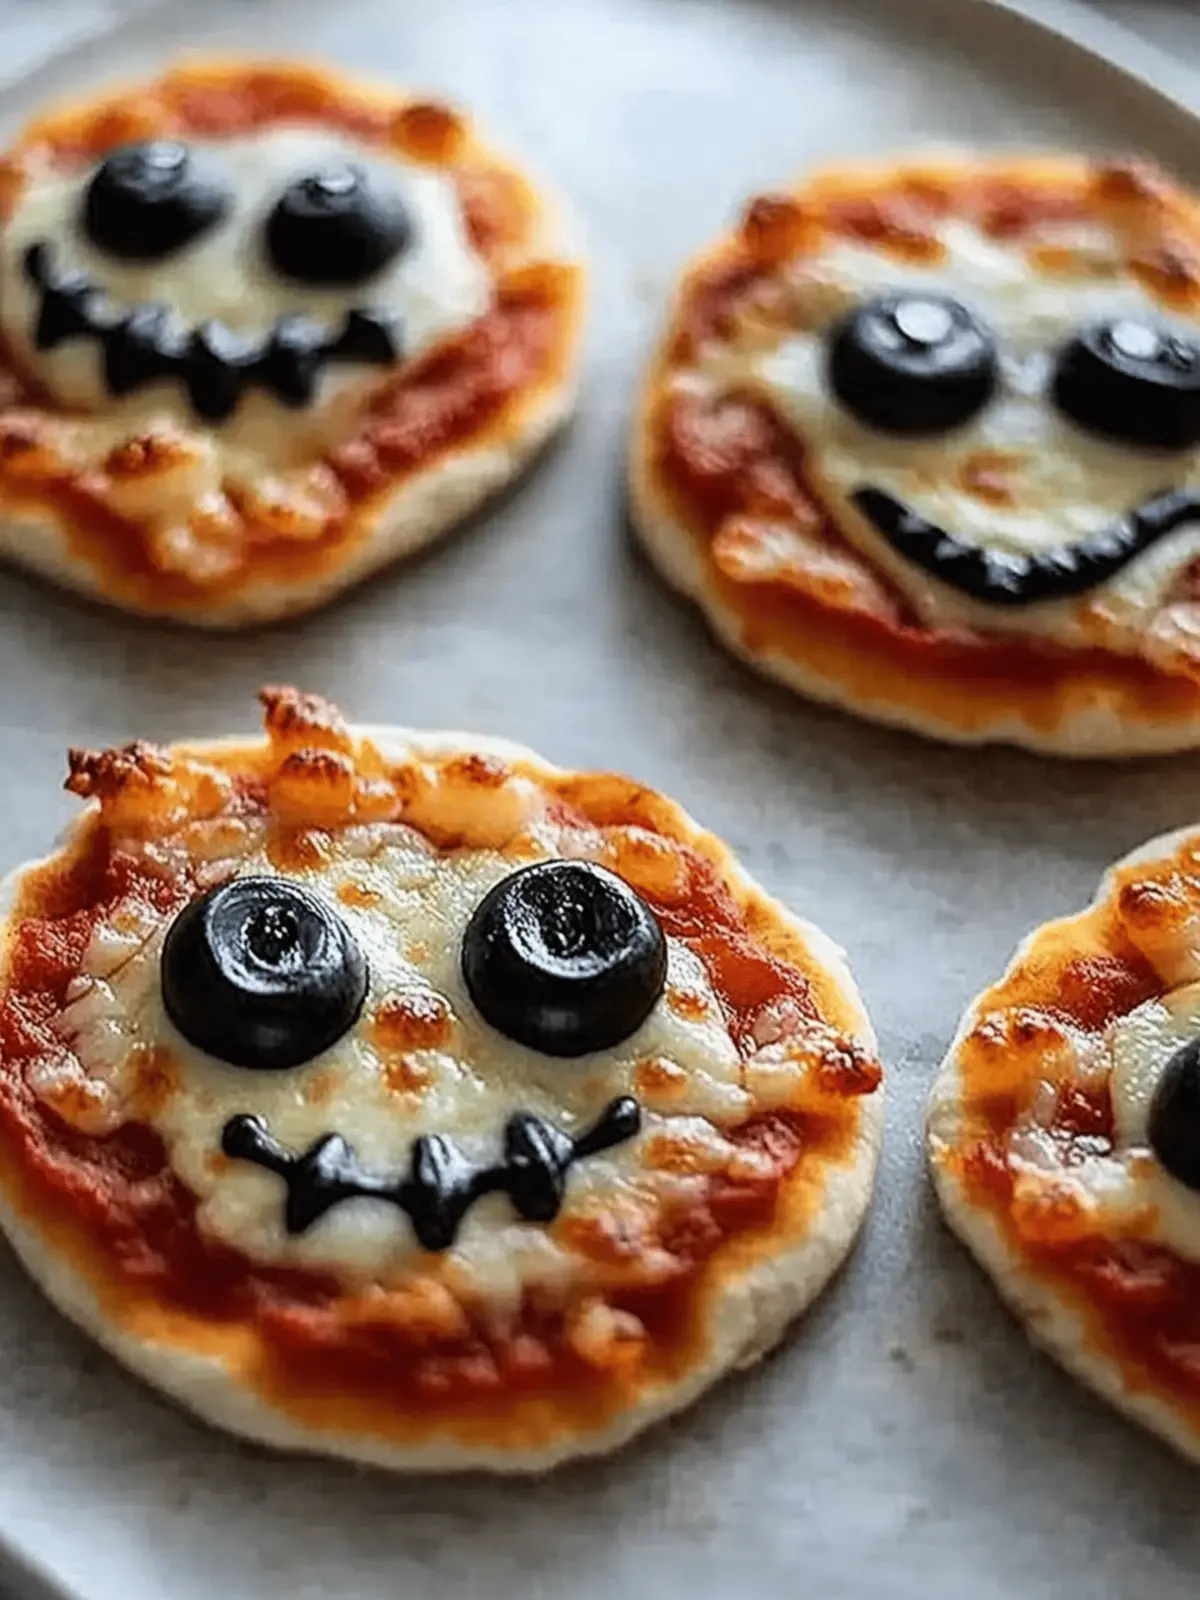
As the leaves turn crisp and the nights grow longer, there’s nothing quite like the excitement of Halloween creeping into the kitchen. Picture this: a bustling household filled with laughter, the sweet scent of melting cheese, and the playful chaos of kids crafting spooky faces on miniature pizzas. That’s exactly what you’ll experience with these Mini Halloween Pizzas! Transforming ordinary ingredients into ghostly delights, this recipe is not only simple and fun but also encourages creativity with every topping.
Whether you’re hosting a Halloween bash or enjoying a cozy night in, these customizable pizzas—featuring cheerful jack-o’-lanterns, eerie mummies, and playful ghosts—are sure to impress both young and old. So roll up your sleeves, gather your favorite toppings, and let’s make some magic in the kitchen this spooktacular season!
Why are Mini Halloween Pizzas a Must-Try?
Simplicity at its best: These Mini Halloween Pizzas are easy to whip up, perfect for cooks of all skill levels.
Creativity unleashed: Encourage your kids to enjoy a fun, interactive cooking experience by letting them design their spooky creations.
Endless variety: Customize toppings to suit your taste—swap cheese for a vegan option or add roasted veggies for a twist.
Crowd-pleaser: Ideal for parties or family movie nights, these pizzas will delight guests of all ages with their playful designs.
Quick prep: With a baking time of only 10 minutes, you can have these delicious treats ready in no time!
Feeling adventurous? Check out our variation ideas to spice up your Halloween menu!
Mini Halloween Pizzas Ingredients
For the Crust
• Mini Pizza Crusts – Choose store-bought for convenience or make them at home for a personalized touch.
For the Sauce
• Pizza Sauce – Traditional tomato sauce adds a classic flavor, but you can opt for garlic butter or pesto for a twist.
For the Cheese
• Shredded Mozzarella Cheese – This gives your pizzas that cheesy, gooey goodness; try vegan cheese for a dairy-free option.
• Mozzarella Slices – Perfect for crafting ghost shapes; use cookie cutters for added fun!
For the Toppings
• Pepperoni Slices – Add a savory kick; swap for sliced veggies to keep it vegetarian.
• Black Olives – Slice for creepy eyes on your designs or use capers as a fun alternative.
• Orange Bell Pepper – Carve into jack-o’-lantern faces for a festive touch; any color bell pepper works, but orange is thematically perfect.
Now you’re just a few steps away from crafting your very own Mini Halloween Pizzas—let the spooky fun begin!
How to Make Mini Halloween Pizzas
-
Preheat Oven: Set your oven to 400°F (200°C). This will ensure your Mini Halloween Pizzas get that perfect golden crust!
-
Prepare Baking Sheet: Line a baking sheet with parchment paper. This will prevent sticking and make cleaning up super easy after your spooky creations are baked.
-
Assemble Pizzas: Place your mini crusts on the lined sheet and spread a generous layer of pizza sauce over each one. This forms the delicious base for all your fun toppings!
-
Create Designs:
- Ghost Pizzas: Cut ghost shapes from mozzarella slices and carefully place them on the sauce, adding slices of black olives for spooky eyes.
- Mummy Pizzas: Layer strips of mozzarella in a criss-cross fashion over the sauce, using olive slices to create the eyes.
- Jack-o’-Lantern Pizzas: Top with shredded cheese and arrange orange bell pepper slices into little pumpkin faces for a festive flair.
-
Bake: Pop the pizzas into the oven and let them bake for about 8-10 minutes, or until the cheese is melted and bubbly, and the crust is beautifully golden.
-
Serve Warm: Once they’re done, take them out of the oven and enjoy your delightful, spooky pizzas warm from the oven!
Optional: Serve with a side of festive dipping sauces like ranch or marinara for an extra punch!
Exact quantities are listed in the recipe card below.
How to Store and Freeze Mini Halloween Pizzas
Fridge: Store leftover Mini Halloween Pizzas in an airtight container for up to 3 days. This keeps them fresh and ready to enjoy later.
Freezer: Freeze unbaked assembled pizzas for up to 1 month. Ensure they’re wrapped tightly in plastic wrap and then foil to prevent freezer burn.
Reheating: When ready to eat, bake from frozen at 400°F (200°C) for 10-12 minutes or until heated through. This helps retain that crispy crust and melty cheese.
Wrap Properly: For best results, wrap slices individually for easy snacking later on. This makes it a breeze to enjoy these fun Mini Halloween Pizzas anytime!
Make Ahead Options
These Mini Halloween Pizzas are perfect for meal prep enthusiasts looking to save time on busy weeknights! You can prepare the individual components up to 3 days in advance. Start by prepping the mini pizza crusts, sauce, and toppings like sliced mozzarella, pepperoni, olives, and bell peppers, then store them separately in airtight containers in the refrigerator. This ensures everything stays fresh and ready for assembly! When you’re ready to serve, simply assemble the pizzas and bake them at 400°F (200°C) for about 8-10 minutes. You’ll have delightfully spooky pizzas just as delicious as if they were made fresh on the spot!
What to Serve with Mini Halloween Pizzas?
Get ready to set the scene for a delightful Halloween gathering with these playful and spooky treats!
-
Witch’s Brew Lemonade: This refreshing drink adds a fun twist with its vibrant color, perfectly complementing the festive spirit of the pizzas.
-
Crispy Kale Chips: These add a satisfying crunch and a hint of healthy contrast, making the meal feel balanced while keeping the fun alive.
-
Vegetable Platter: Fresh veggies with a spooky-themed dip, like a ghostly hummus, offer a colorful and crunchy pairing, enticing both kids and adults.
-
Pumpkin Flavored Treats: Seasonal donuts or cookies bring on the holiday vibe and offer a sweet end to your mini pizza feast.
-
Cheesy Garlic Bread: Indulge in this gooey, buttery delight that pairs beautifully with your pizzas, enhancing the cheesy flavors everyone loves.
-
Hot Chocolate: Perfect for cozying up after the festivities, this warm and sweet drink can be topped with marshmallows for an added treat.
Gather your favorite accompaniments and prepare for a delightful evening filled with laughter and spooky flavors!
Mini Halloween Pizzas Variations
Get creative and customize your Mini Halloween Pizzas to suit every taste and dietary need!
-
Cheese Swap: Replace mozzarella with cheddar or pepper jack for a deliciously bold flavor. It adds extra zing that both kids and adults will love.
-
Veggie Delight: Opt for thinly sliced vegetables like zucchini, mushrooms, or colorful bell peppers instead of pepperoni. This twist keeps it fresh and vegetarian-friendly.
-
Spicy Kick: Add sliced jalapeños or crushed red pepper flakes to give your pizzas a fiery twist. It’s a great way to personalize the heat level!
-
Crust Variation: Substitute traditional pizza crust with cauliflower crust for a low-carb option. It’s a fabulous choice without sacrificing the fun!
-
Sauce Adventure: Try swapping the classic tomato sauce for pesto or BBQ sauce for a unique flavor profile that adds a gourmet touch to your creations.
-
Seasonal Toppings: Incorporate seasonal ingredients like roasted pumpkin or spinach for a festive flair. It’s a wonderful way to embrace autumn’s bounty.
-
Fun Shapes: Use cookie cutters to shape other toppings, like pepperoni or bell peppers, into fun shapes for an exciting visual treat that boosts creativity.
-
Herb Infusion: Sprinkle fresh herbs like basil or oregano on your pizzas before baking for an aromatic lift. It adds vibrant flavor with every bite!
Let your imagination flourish and make these Mini Halloween Pizzas uniquely yours!
Expert Tips for Mini Halloween Pizzas
-
Involve the Kids: Allow children to help assemble their Mini Halloween Pizzas. It’s a fun way to bond and encourages their creativity in the kitchen!
-
Watch the Baking Time: Depending on your crust thickness, baking times may vary. Keep a close eye on them to avoid over-baking and ensure a perfect, crispy crust.
-
Use Quality Ingredients: Fresh, high-quality ingredients result in the best flavors. This is especially true for your sauce and cheese—choose what you love!
-
Customize Wisely: Don’t hesitate to modify toppings to suit dietary preferences. Remember, you can always swap pepperoni for veggies to keep things vegetarian.
-
Prepare Ahead: To save time on the day of your Halloween festivities, prep ingredients in advance. Assemble just before baking for the freshest result.
Mini Halloween Pizzas Recipe FAQs
How do I choose the right ripeness for the ingredients?
Absolutely! For the best taste, select fresh vegetables. Look for bell peppers that are firm and vibrant in color without any dark spots. Mozzarella cheese should feel soft and springy. For olives, pick ones that are plump and moist for that perfect bite.
What’s the best way to store leftovers?
Store any leftover Mini Halloween Pizzas in an airtight container in the fridge for up to 3 days. This keeps them fresh and ready for quick snacking or meals later. Don’t forget to reheat them gently to maintain that crispy crust—just pop them back in the oven for a few minutes!
Can I freeze Mini Halloween Pizzas?
Yes, absolutely! For freezing, assemble the pizzas but do not bake them. Wrap each pizza tightly in plastic wrap, followed by foil to prevent freezer burn, and freeze for up to 1 month. When you’re ready to enjoy, just bake from frozen at 400°F (200°C) for 10-12 minutes until heated through and crispy.
What should I do if my crust turns out soggy?
Very good question! If your pizzas are soggy, it’s often due to too much sauce or not baking them long enough. Try using less sauce and ensure you’re baking them until the cheese is bubbly and the crust is golden brown. Keep an eye on them while they bake for best results—bake times can vary with crust thickness.
Are Mini Halloween Pizzas suitable for everyone’s diet?
You got it! These pizzas can easily cater to various dietary needs. For a gluten-free option, use gluten-free mini crusts. Want a dairy-free version? Just swap the mozzarella for vegan cheese. Also, consider using vegetables in place of pepperoni for a vegetarian delight. There’s truly something for everyone!
Can I prepare the ingredients in advance?
Absolutely! For a smoother cooking experience on Halloween night, you can prep all your toppings a day in advance. Chop your vegetables, slice cheeses, and store them in separate airtight containers. Just assemble the pizzas when you’re ready to bake, ensuring they stay fresh and fun for all your guests!
Mini Halloween Pizzas: Fun, Easy Recipes For Spooky Nights
Ingredients
Equipment
Method
- Preheat Oven: Set your oven to 400°F (200°C).
- Prepare Baking Sheet: Line a baking sheet with parchment paper.
- Assemble Pizzas: Place mini crusts on the lined sheet and spread pizza sauce over each one.
- Create Designs: Cut ghost shapes from mozzarella slices, place them on sauce, add black olives for eyes. Layer mozzarella strips for mummies and arrange orange pepper for jack-o'-lanterns.
- Bake: Pop the pizzas into the oven for 8-10 minutes or until cheese is melted and bubbly.
- Serve Warm: Enjoy your delightful, spooky pizzas warm from the oven!

